Troubleshooting Heat Pump Not Heating? Find Solutions Today!
Troubleshooting Heat Pump Not Heating? Find Solutions Today!
Troubleshooting Heat Pump Issues: A Practical Homeowner’s Guide to Diagnosing and Fixing Common Problems
Heat pumps move heat between your home and the outdoors to heat and cool living spaces Catching problems early keeps your house comfortable, saves energy, and protects the equipment This guide walks homeowners through practical troubleshooting: why a system stops heating, how to spot and diagnose frozen coils, what common mechanical and electrical failures look like, and when to call in a pro You’ll find step‑by‑step DIY checks, symptom-to-cause guidance, typical repair cost ranges, and a straightforward maintenance checklist to reduce breakdowns and improve seasonal performance We use standard HVAC terms—thermostat, compressor, reversing valve, defrost cycle, refrigerant—so you can follow each diagnostic step and know when a problem is homeowner-level or beyond By the end, you’ll have a clear decision path for repairs, realistic cost expectations, and actionable maintenance tasks to keep your system running well.
Why Is My Heat Pump Not Heating Common Causes and Solutions
When a heat pump isn’t producing heat, the issue usually falls into one of three buckets: refrigerant and sealed‑system problems, control or settings errors, or airflow restrictions Low refrigerant reduces heat transfer at the outdoor coil, a stuck reversing valve can stop the unit from entering heating mode, and blocked airflow or the wrong thermostat setting keeps warm air from reaching rooms Below are the top causes and safe actions homeowners can try before calling a technician Use this short checklist to match symptoms to likely fixes and prioritize your next steps.
Common immediate causes to check:
Low refrigerant charge — reduces heat transfer and weakens heating output.
Thermostat accidentally set to cooling or an incorrect schedule — leaves the unit blowing cold air.
Restricted airflow from a clogged filter or closed/blocked vents — lowers performance and can lead to icing.
Stuck reversing valve or failed control board — can leave the system electrically locked in the wrong mode.
These checks help you decide whether the problem is a simple homeowner fix (change a filter, correct thermostat settings) or a sealed‑system or electrical fault that needs a licensed technician Identifying whether the issue is control‑based, airflow‑related, or refrigerant/mechanical lets you focus repairs and avoid unnecessary expense.
What Are the Main Reasons a Heat Pump Blows Cold Air?
If your heat pump is blowing cold air when it should be heating, the usual causes are: incorrect thermostat settings, a stuck reversing valve, or an insufficient refrigerant charge upsetting the evaporation/condensation balance The easiest place to start is the thermostat: make sure the system is set to “Heat,” the setpoint is higher than room temperature, and the display and batteries are working If the thermostat looks correct but the outdoor unit is running and air is still cold, listen for an outdoor fan that never stops or for defrost cycles that don’t run — both can point to reversing valve or control problems
These basic checks separate simple user errors from component failures and tell you whether to call a refrigeration technician.
How Can I Fix Thermostat and Electrical Issues Affecting Heat Pump Heating?
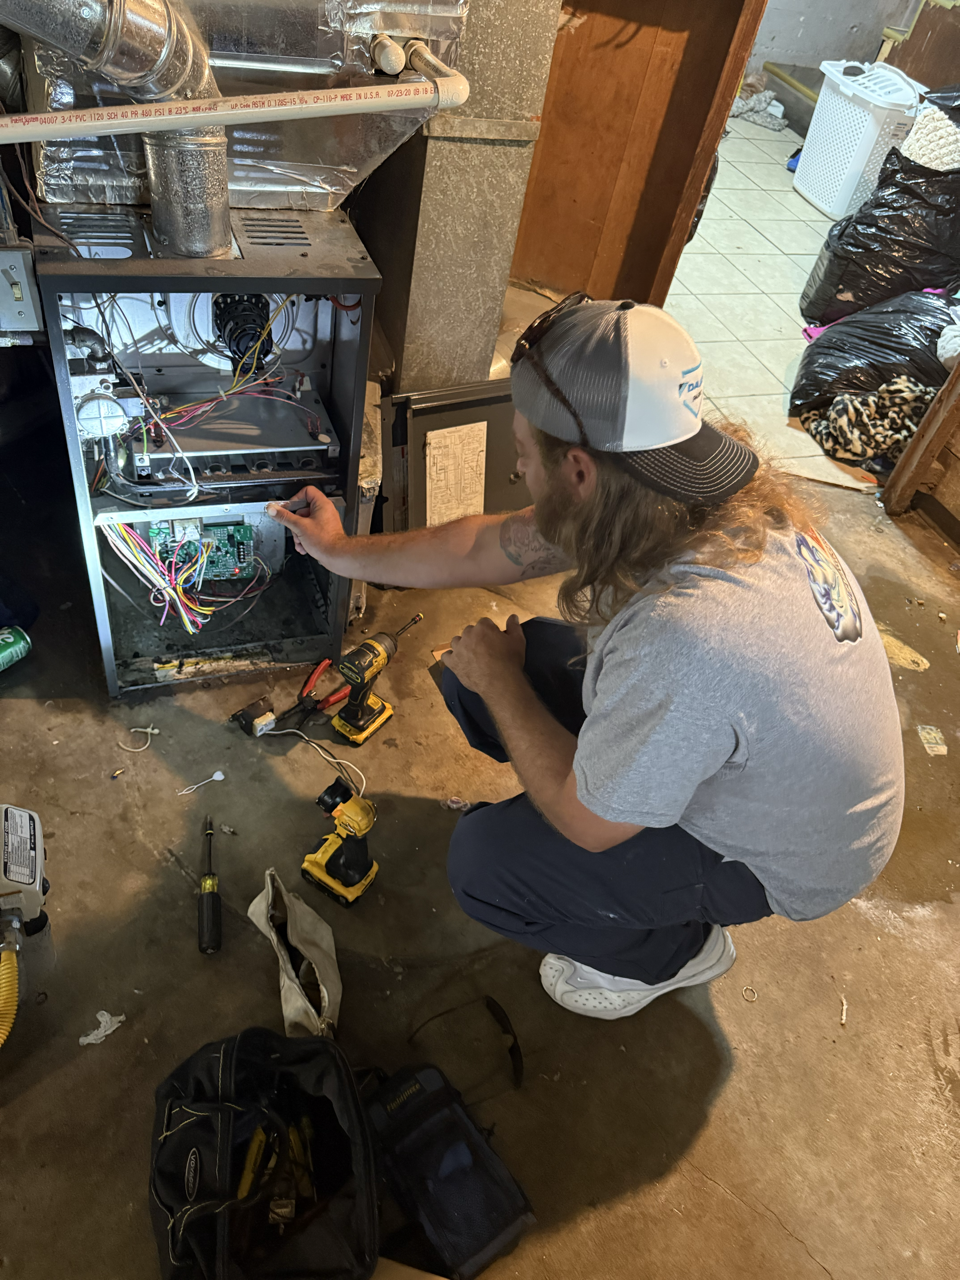
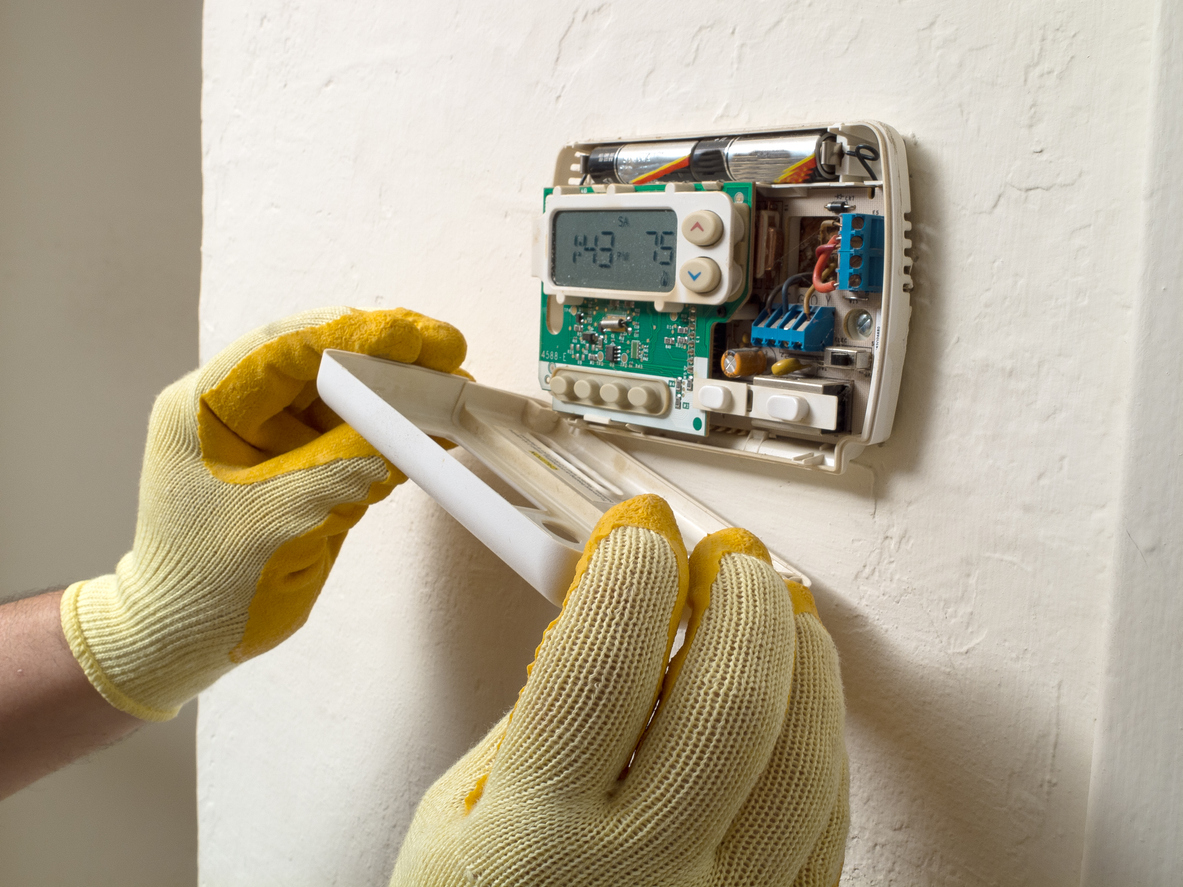
Thermostat and basic electrical checks are generally safe for homeowners and often restore heating Start by confirming heat mode, replacing thermostat batteries, and checking the setpoint and schedule Then inspect the indoor and outdoor disconnects and the HVAC breaker in your panel; a tripped breaker or blown fuse will stop the compressor and can appear as no heat or intermittent operation If breakers keep tripping or wiring looks burned, stop and call a professional — repeating electrical faults usually point to control‑board, capacitor, or motor problems that need a licensed technician Simple power‑cycling and small thermostat adjustments will often fix control issues; persistent electrical problems require professional diagnosis.
How Do I Diagnose and Resolve Heat Pump Freezing Up Problems?
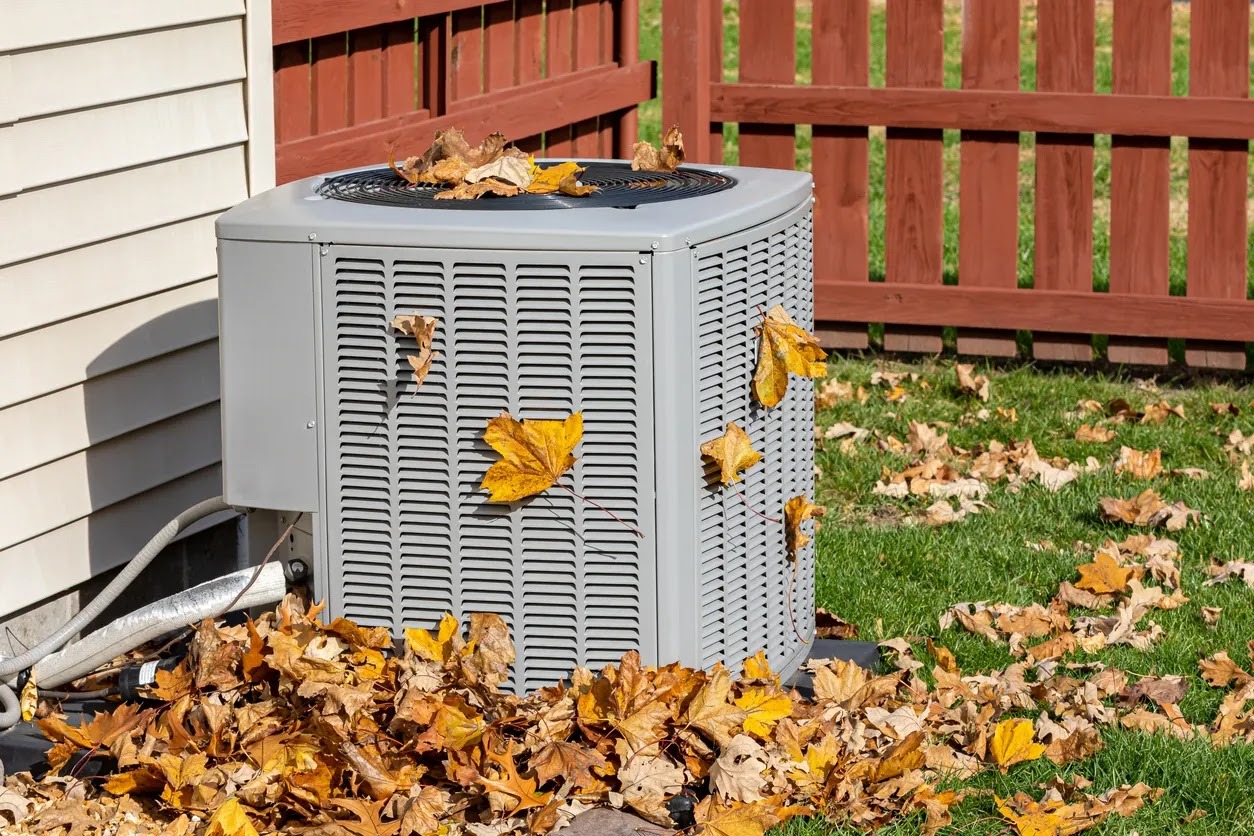
Freezing up happens when ice builds on outdoor coils or refrigerant lines, which reduces heat transfer and stresses the compressor Diagnosing it means checking airflow, refrigerant charge, and the defrost function Low refrigerant lowers coil pressure and temperature and encourages ice; restricted airflow from a dirty filter or blocked outdoor unit reduces incoming heat; and a failed defrost cycle prevents normal ice removal Start with safe visual checks: make sure airflow around the outdoor unit is clear and fins are free of debris, then watch whether the defrost cycle runs (the outdoor fan should stop briefly and the ice should melt) These steps show whether a homeowner remedy (clear debris, change filter) is likely or whether sealed‑system repairs are needed to protect the compressor.
When ice is present, take these immediate, safe actions:
Switch the system to “Off” and use backup heat if available to avoid compressor damage.
Remove loose snow and debris from around the outdoor unit to restore airflow.
Replace or clean the indoor air filter to improve circulation.
If ice returns after these steps, power down and schedule a professional inspection.
If icing continues after basic fixes, it usually indicates refrigerant loss or defrost control failure — issues that require licensed service to test pressures and electronics.
What Causes Frozen Coils and Ice Build-Up on Heat Pumps?
Coils freeze when the coil surface drops below freezing while moist air moves across it Common causes include low refrigerant charge, restricted airflow (dirty filters or blocked outdoor units), or defrost systems that aren’t working Low refrigerant lowers the evaporating temperature and enlarges the freeze‑prone area on the coil, while poor airflow reduces the heat that keeps the coil above freezing Signs include heavy ice on the outdoor coil and reduced indoor heat Short‑term homeowner fixes are restoring airflow and allowing the coil to thaw, but repeated freezing should be diagnosed by a pro to avoid compressor damage.
Diagnosing heat pump faults can be complex; purpose‑built systems and diagnostic methods help identify common failures and keep equipment running reliably
How Does the Defrost Cycle Work and When Does It Fail?
The heat pump defrost cycle either reverses refrigerant flow or adds electric heat briefly to melt frost on the outdoor coil It runs when sensors detect ice buildup; failures happen when defrost sensors, the defrost control board, or the reversing valve are faulty For a quick home check, watch whether the outdoor fan pauses and whether the coil warms during defrost intervals; if the unit never defrosts or defrosts too often, a component is likely failing Reading sensor values and control signals requires diagnostic tools, so defrost‑cycle faults are usually best handled by licensed HVAC technicians Proper defrost operation restores efficient heat transfer and prevents damaging ice accumulation.
What Are the Most Common Heat Pump Problems and How Can I Identify Them?
Typical heat pump problems include refrigerant leaks, compressor issues, unusual noises, short cycling, and airflow restrictions Identifying each problem relies on matching symptoms to likely causes and performing simple, safe checks Refrigerant leaks drop heating capacity and can cause coil freezing; a compressor that hums but won’t start often points to a bad capacitor or motor; unusual sounds—clanking, hissing, squealing—usually map to mechanical or refrigerant issues The short symptom table below helps you decide whether a DIY check is appropriate or if a professional repair is required.
Use this symptom‑to‑cause table to prioritize safe homeowner checks and know when sealed‑system or mechanical work must be done by a licensed technician to meet regulations and protect your equipment.
How Do Refrigerant Leaks Affect Heat Pump Performance?
A refrigerant leak lowers system pressure and reduces heat transfer, causing longer runtimes, lower indoor temperatures, and sometimes coil freezing Because refrigerant charge directly affects evaporating temperature, even small losses can noticeably cut heating performance Leaks often show up near service ports, valve stems, and coil brazes; oil stains or hissing noises can indicate an active leak Homeowners can use a basic soap‑bubble test on visible fittings to check for obvious leaks, but refrigerant repair and pressure testing require certified technicians When a leak is found, the repair sequence is to fix the leak, evacuate and recharge the system to the manufacturer’s charge, and verify pressures and performance.
What Do Strange Noises from My Heat Pump Indicate?
Different noises point to different failures: hissing can mean refrigerant leaks or pressure relief events; clanking often comes from loose hardware or damaged fan blades; squealing usually signals motor or belt wear; buzzing can indicate electrical issues or failing contactors If a noise is loud, sudden, or accompanied by burning smells, shut the unit down immediately
testimonials
hear what our satisfied clients have to say
What an amazing company to work with. Timely and clear communication, fair prices, professionalism and honesty are all clear values for these guys. Appreciate the quick service and repair. They had us back up and running in no time at all. 3D is my new go-to!
Michael C.
Had Josh’s crew come out and did a complete change over the outdoor unit and the air handler in 6hrs. I thought it would have taken a couple of days but they knocked it out of the park. They also came back and ran a couple ducts for me. Thank you guys! Hope I don’t need y’all for a long time, but I’ll definitely send friends and family your way.
Jeff B.
When I was informed by a large company that I needed a New furnace, I found a small local company for a second opinion. I went with 3D Heating and Cooling. They came out promptly for a FREE second opinion, and quickly made the diagnosis. Not only did I Not need a New Furnace, they were able to fix my issue on the spot!
Leslie C.
Josh and his team were extremely responsive and quick when our AC suddenly went out. The 3D team presented multiple paths forward and was able to get our AC back up the next day. We are very appreciative of their service!
Sam L.
We had our compressor go out on us earlier in the week. We came across 3D heating and Cooling and got a response within minutes of reaching out to them even though it was after 10pm. After meeting with Zack and going over our options, he had two of his installers, Juwan and Bryant, out the same day. They were very knowledgeable and managed to complete the installation in about 2 hours. Overall very impressed with the company and every employee we had the pleasure of interacting with.
Nicholas H.
Had a new ac put on my house they did wonderful fairly priced and even went above and beyond and replace some old duct work I will def use them again thank you Josh
Jeff J.
Everything was so easy and professional. I signed the agreement one day and they did the job next day ! And I can't say enough about the polite young men that installed my unit. Thank you 3D .
Judy G.
Customer service is top notch! Josh and Zach have great communication with customers and do what they say they are going to do. They texted and called to keep me updated on the status of service. Fast turnaround for service as well! I have a new heating and air company that I know I can depend on! I highly recommend 3X Heating and Cooling for any a/c or heating needs!
Nancy B.
Zach was out to take a look at my 40 year old system within 2.5 hours of me reaching out yesterday, we discussed solutions last night, and he had my new unit installed by 5PM today.
All this while the inside of my house was 90 degrees during this more than week long heat wave. Couldn't be more thankful for the quick response and get it done mentality.
I'll recommend him and the team to all of my real estate clients going forward.
Weston F.
I give 3D a 5 star rating. Josh was the tech who repaired my AC. This guy is so polite, courteous, knowledgeable, friendly. You couldn't ask for a nicer person. He didn't give up until the unit was up and running. I would recommend 3D to anyone. Great job Josh.


.svg)


.avif)